
Home › Blog › Flex Wall Installation NYC
Flex Wall Installation NYC: Cost & Process (2026 Guide)
By Donny Zanger · Published November 24, 2025 · · 8 min read
Flex wall installation in NYC starts from $2,250 and takes about a day from first cut to finished paint. That covers an 8 ft ceiling, a standard swing door, and up to 12 ft of width. The final number depends on your room size, the door you pick, and whether you add soundproofing. If you're trying to turn a one-bedroom into a two-bedroom in Astoria, or close off a corner of a Bushwick loft for a home office, this guide walks through the real numbers, the install process, and the landlord conversation — based on more than 5,000 installations across all five boroughs over 15+ years.
Want a number for your exact room? Call +1 646-569-9975 and tell us your dimensions. Most clients get a price within the hour.
Call +1 646-569-9975What Is a Flex Wall?
A flex wall is a floor-to-ceiling partition that locks into place using pressure instead of nails, screws, or adhesive. Installers also call it a pressurized wall — at most NYC companies, including ours, the two names describe the same product. We cover the naming confusion in detail in our flex wall vs. pressurized wall comparison, but the short version is this: if a wall stays up using tension against your floor and ceiling, it's a flex wall, no matter which word is on the invoice.
The panels are framed in aluminum or steel track and finished with drywall-style board, so the wall looks and feels like a real bedroom wall once it's painted. Because nothing is fastened into your existing structure, the wall comes down cleanly at the end of your lease.
How Much Does Flex Wall Installation Cost in NYC?
A flex wall starts from $2,250 — that covers an 8 ft ceiling, a standard swing door, and up to 12 ft of width. Add-ons are quoted upfront on top of that floor, so you know your full price before we start:
| Add-On | Price |
|---|---|
| Single French door | +$450 |
| Pocket sliding door | +$300 |
| Soundproofing | +$350 |
| Seamless finish | +$450 |
| Each additional foot of width beyond 12 ft | +$190 |
| 9 ft ceiling | +$250 |
| 10 ft ceiling | +$500 |
Room size and ceiling height move the price more than almost anything else. A Crown Heights pre-war with 10-foot ceilings needs more material than a standard Queens two-bedroom, which means a bigger cut list and a higher number on the quote. For a full breakdown of every variable that affects price, see our complete pressurized wall cost guide.
How Does Flex Wall Installation Actually Work?
The process is faster than most renters expect, and it follows the same three steps on almost every job.
Measure and quote. Tell us your room's length, width, and ceiling height. We give most clients a firm price the same day, often within the hour.
Schedule the install. Most jobs book within three to five days of the quote. You don't need to clear the room completely — just move anything within a few feet of where the wall will go.
Install day. A crew measures, cuts the panels on site, and locks the wall into place using the pressure system. A standard wall takes a few hours; a larger wall with a custom door can run closer to a full day.
There's no drying time and no dust cloud hanging around afterward. Most clients are using the new room the same evening the crew leaves.
Do I Need My Landlord's Approval for a Flex Wall?
Yes, and this is the question we hear before almost every booking. Flex walls are legal in NYC when they meet building code requirements for egress, ventilation, and sprinkler clearance — we check all three before any install, and we walk through the full legal picture in our pressurized walls legality guide.
That said, code compliance isn't the same thing as landlord approval. Most buildings in Brooklyn and Queens approve flex walls without much friction, because the install leaves no permanent damage. Co-ops on the Upper West Side and in pre-war Manhattan buildings tend to ask more questions, since house rules can be stricter than city code. Either way, get written approval before the crew shows up — a quick email confirming the install protects you if the building changes management later. For the official rules on egress and ventilation, the NYC Department of Buildings is the source we point clients to directly.
We never suggest installing without telling your landlord first. It's not necessary, and skipping that conversation just creates a problem for you at move-out that a five-minute email would have prevented.
Worried your specific building will say no? Call +1 646-569-9975 and we'll tell you what to expect before you ask.
Call +1 646-569-9975What Are the Specs? Thickness, Weight Limits, and Soundproofing
A standard flex wall panel runs about five inches thick once finished, which is close enough to a real wall that most people can't tell the difference once it's painted. Each panel safely holds up to 25–30 pounds of décor, so a few shelves or framed art are fine without extra reinforcement. If you're planning to mount a TV or anything heavier, tell us during the quote call so we can build in reinforcement at the install stage rather than after the fact.
Soundproofing is a flat $350 add-on, not a default. Adding mineral wool insulation inside the panel cuts down on conversation noise significantly — it won't make the room silent, but it's a real difference for anyone splitting a room with a roommate or taking calls from a home office in a Harlem brownstone or a SoHo loft. Most clients who add soundproofing do it for exactly one of those two reasons.
Should You Get a Flex Wall or Something Else?
If you want full privacy and a room that feels real, a flex wall is almost always the right call. If your building won't approve any wall that touches the ceiling, a bookcase wall is the usual fallback — we compare both directly, cost and privacy side by side, in bookcase wall vs. pressurized wall.
There's also a third option for tighter budgets or stricter buildings: a freestanding or partial wall that stops short of the ceiling. It has no published price — it's quoted through the form, room by room. It also skips landlord approval in most leases, since it doesn't attach to anything. The tradeoff is privacy — a gap at the top means more sound and less of a true bedroom feel. For a renter in a strict pre-war co-op who just needs a visual divider, that tradeoff is often fine. For someone splitting a bedroom with a new roommate, it usually isn't.
Either way, don't let the terminology slow you down. Whether your contractor calls it a flex wall, a pressurized wall, or a temporary partition, the questions that actually matter are the same: how does it attach, what's included in the price, and is removal part of the deal.
Want a number for your specific apartment? Tell us your room dimensions and we'll give you a price the same day.
Get Your Free QuoteFrequently Asked Questions
Is a flex wall the same as a pressurized wall?
In almost every case, yes. Both terms describe a floor-to-ceiling partition held in place by pressure instead of nails or screws. Most NYC installers, including us, use the names interchangeably for the same product.
How much does flex wall installation cost in NYC?
A flex wall starts from $2,250, covering an 8 ft ceiling, a standard swing door, and up to 12 ft of width. Doors, soundproofing, and taller ceilings are quoted as add-ons on top of that floor.
Do I need my landlord's permission for a flex wall?
Yes. Get written approval before installation, even though most buildings approve flex walls because they leave no permanent damage. Co-op boards and pre-war buildings sometimes require extra paperwork.
How long does flex wall installation take?
A standard wall takes a few hours from start to finish. Larger walls or custom door configurations can take closer to a full day.
How much weight can a flex wall panel hold?
Up to 25–30 pounds of décor per panel without extra reinforcement. Tell us if you're planning to mount a TV or anything heavier so we can reinforce the panel during installation.
Ready to get your exact price? Call +1 646-569-9975 for a free same-day quote, or get a price online. We install flex and pressurized walls in Brooklyn, Queens, Manhattan, the Bronx, Staten Island, Hoboken, and Jersey City.
Get Your Free QuoteDonny Zanger has installed flex and pressurized walls across NYC for 15+ years and has personally overseen more than 5,000 installations in Brooklyn, Queens, Manhattan, the Bronx, and Hoboken. He started Pressurized Walls NYC because he needed a way to afford his own rent. pressurizedwallsnyc.com | +1 646-569-9975
How Temporary Walls Are Revolutionizing Home Office Spaces in NYC?
Overview: Temporary Walls for Home Offices in NYC
Temporary walls are non-permanent partitions popular in New York City for creating flexible home office spaces without damaging apartments.
- Use pressure systems to stay in place, avoiding screws or nails.
- Provide privacy and productivity in small living spaces.
- Comply with NYC building codes and require landlord approval.
- Easy to install and remove, making them ideal for renters and flexible work needs.
- Cost-effective alternative to permanent renovation or larger apartments.
Temporary walls help New Yorkers maximize limited space, create quiet work areas, and adapt to evolving lifestyles.
The NYC Space Challenge
Living in New York City means dealing with small spaces and high rents. Many people now work from home or have hybrid jobs. This makes it important to have a quiet home office. But most renters can’t afford big renovations or permanent changes. That’s why temporary walls have become popular. They offer an easy way to make a private workspace without lasting changes to the apartment.
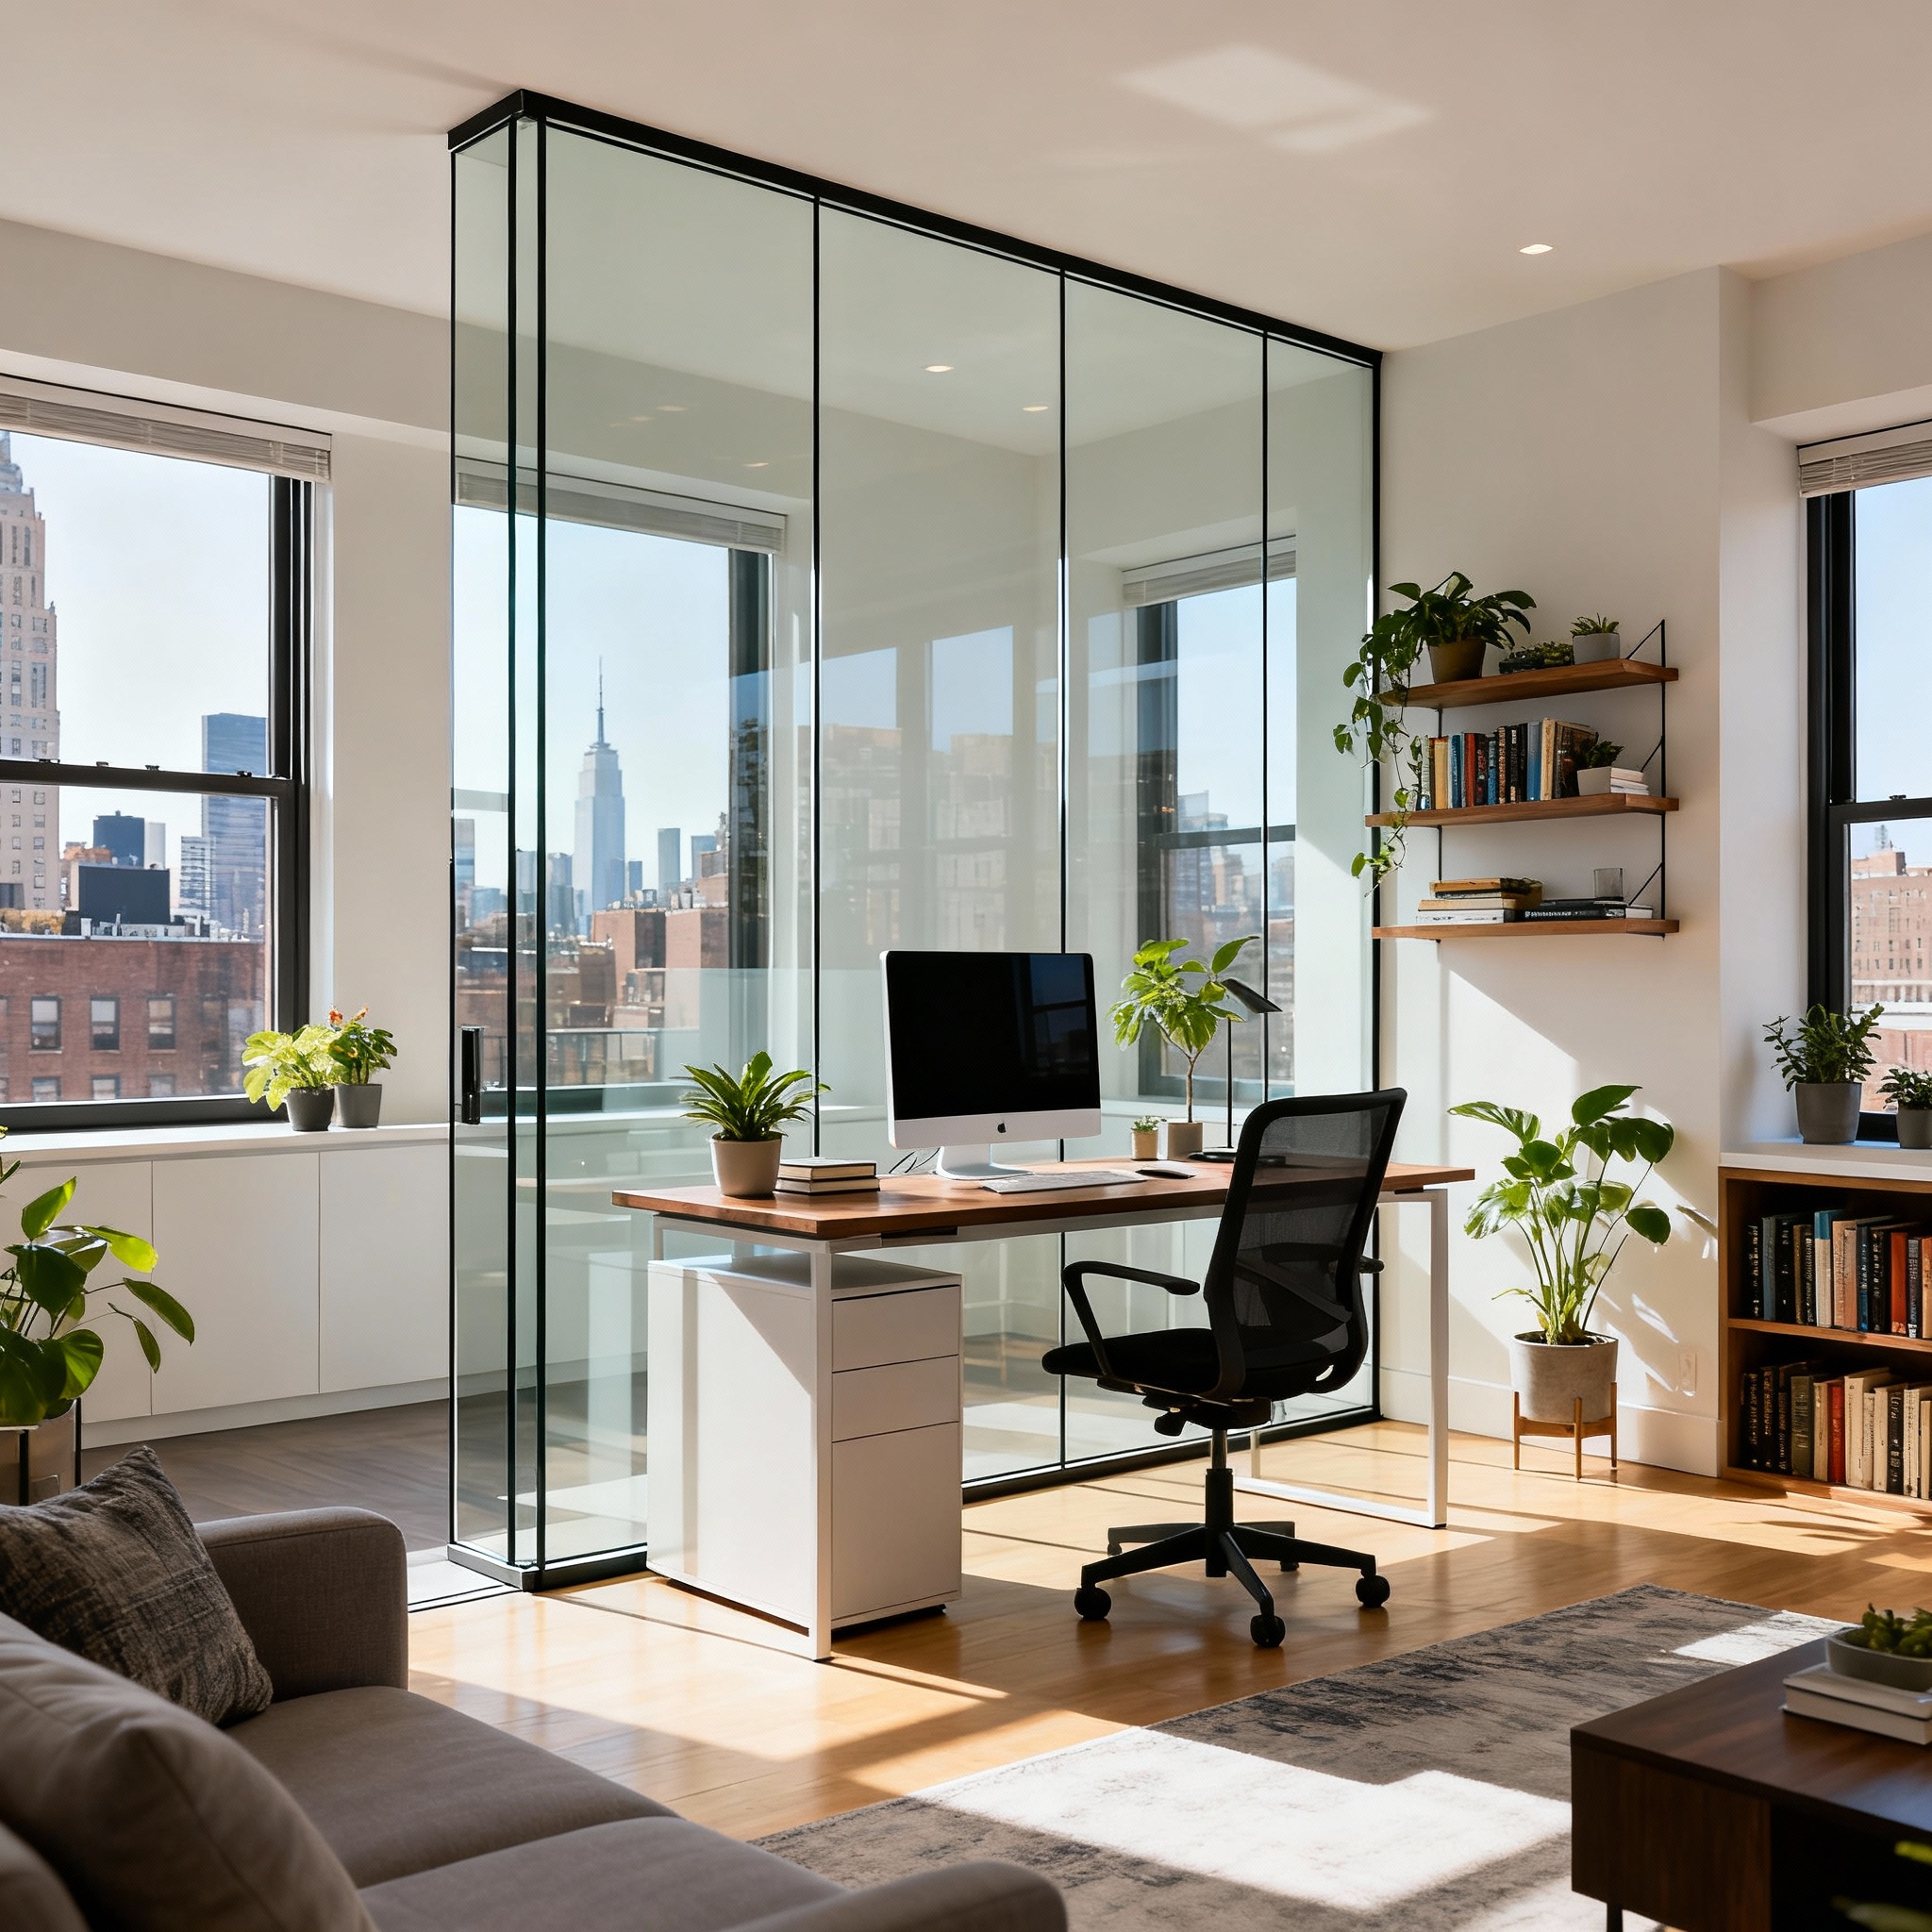
What Are Temporary Walls and Flex Walls?
Temporary walls are light, movable partitions made from materials like drywall or plywood. Instead of using screws, these walls stay up through pressure between the floor and ceiling. This keeps the space safe without any damage. Many landlords approve them because they don’t leave marks or holes. Among these options, the pressurized wall is especially popular in NYC for its ease of installation and renter-friendly design.
Benefits of Dividing Walls for Home Offices
Many New Yorkers use temporary walls to create better workspaces at home. They offer:
- Privacy and Focus: These walls block noise and distractions, making it easier to work or attend online meetings.
- Flexible Designs: The walls can be straight or shaped to fit any spot, from a room corner to an open area.
- No Damage to Walls or Floors: Since no nails or screws are used, renters don’t risk losing deposits.
- Fast Setup and Removal: Professionals can set up or take down walls in a few hours, making changes easy.
- Cost-Effective: Installing a temporary wall costs much less than building permanent walls or moving to bigger apartments.
- Popular Ways to Use Temporary Walls
- Using a pressurized wall provides noise reduction and structural flexibility while maintaining compliance with local building codes.
People use these walls for different purposes:
- Dividing Open Spaces: Many turn a big room into smaller areas to make a cozy office.
- Glass Walls: These keep rooms bright while giving visual privacy and modern looks.
NYC Rules for Installing Walls
Before putting up any wall, check with your landlord or building manager. Most NYC landlords want written approval first. Walls must also follow NYC Department of Buildings safety rules, including fire safety and exits. Using an expert installer who knows these rules helps avoid problems and fines.
Conclusion and What to Do Next
Temporary walls are a great tool for New Yorkers who want better work spaces. They save money, comply with building rules, and give flexibility to renters and owners alike. For anyone needing a home office, hiring an experienced installer is a smart first step. These walls can transform any apartment into a more comfortable and productive place.
FAQ
Q1: Are temporary walls legal to install in NYC apartments?
A1: Yes, temporary walls are legal in most NYC apartments, but you should always get permission from your landlord or building management first. Additionally, the walls must comply with NYC Department of Buildings rules, including safety and fire regulations. Hiring a professional installer who understands these local rules ensures your wall is safe, legal, and won’t cause issues later.
Q2: How do temporary walls stay in place without damaging the apartment?
A2: Temporary walls use a pressurized system, where the wall is held securely between the floor and ceiling by tension. This means no screws or nails are needed, so there’s no damage to the walls, floors, or ceilings. This design makes them perfect for renters who want a private workspace but must keep their deposits intact.
Q3: How much does it cost to install a temporary wall in NYC?
A3: The cost of installing a temporary wall in NYC varies based on size, materials, and customization. On average, prices range from $500 to $2,000. This is generally much more affordable than permanent construction, especially when you consider the flexibility and ease of removal that temporary walls offer.
Case Study: Pressurized Wall Installation
Discover how Pressurized walls NYC has helped New York City residents transform living and office spaces using their damage-free pressurized wall systems. This case study highlights challenges, solutions, and benefits of pressurized wall technology that adds functional space without damage or permanent construction.
Download Full Case Study (PDF)Ready to Transform Your Space?
Contact Pressurized Walls NYC today to create your perfect home office with expert temporary wall installation services.
Call Now: +1 646-569-997510 Ingenious Ways to Use Pressurized Walls
Are you feeling cramped in your tiny apartment? Imagine transforming your compact space into a functional, stylish haven that feels twice its size. Welcome to the world of pressurized walls – the game-changing solution for maximizing small living spaces.
1. Create a Private Bedroom Oasis
Transform your studio apartment into a cozy one-bedroom haven with a pressurized wall. This simple addition can dramatically change the feel of your bed area. Imagine waking up in your private sanctuary, separate from your living space. You could even add a curved headboard to soften the look. The size of your IKEA bed won’t be an issue – pressurized walls can be customized to fit any space perfectly.
2. Carve Out a Home Office Space
Working from home in a small apartment? A pressurized wall can be your savior. Create a dedicated workspace that separates your professional and personal life. This setup is perfect for graphic design work or any job requiring focus and privacy. Decorate your new office with a piece of art to inspire creativity. The modern design of pressurized walls complements contemporary decor beautifully.
3. Design a Cozy Reading Nook
Book lovers, rejoice! A pressurized wall can help you create the reading nook of your dreams. Carve out a quiet corner in your living room for your library. Add a comfortable chair, good lighting, and, of course, plenty of bookshelves. Create a gallery wall on your new pressurized fence to showcase your favorite book covers or artwork. This unique piece of your home will make your apartment feel truly stylish and personalized.
4. Establish a Dining Area
No room for a separate dining room? No problem! A pressurized wall can help you create one. Define a dining area in your living room or kitchen with a strategically placed wall. Add a small table and chairs, and voila! You have a dedicated space for meals. Consider a rolling cart table that can be tucked away when not in use. The underside of this rolling cart table can even provide extra storage. For a different shape and more space-saving option, try a fold-down table attached to your new wall.
5. Set Up a Walk-in Closet
Fashion enthusiasts, your dreams of a walk-in closet can come true, even in a small apartment! Use a pressurized wall to section off part of your bedroom or living area. Install an IKEA PAX wardrobe system for customizable storage. Add a stylish PAX door to complete the look. With this setup, you’ll have a dedicated space for all your clothes, shoes, and accessories.
6. Craft a Mini Kitchen
Living in a studio with a tiny kitchenette? Use a pressurized wall to expand your culinary space. Create a partition that houses additional counter space and storage. An IKEA bookshelf can be repurposed as extra kitchen storage. Hunt for unique kitchen accessories at your local thrift store to add character. With some creativity, you can turn this space into a high-end accessory for your home.
7. Build a Workout Corner
Stay fit without leaving your apartment by creating a home gym with a pressurized wall. Section off a corner of your living room for exercise equipment. This new state-of-the-art gym is a bonus to your living space. Use wall anchors to secure equipment like resistance bands or a pull-up bar. Now, you have no excuse to skip your workout!
8. Design a Multipurpose Entertainment Zone
Create the ultimate entertainment zone in your small apartment with a pressurized wall. Separate your living area to include a TV-watching space and a gaming nook. Your new living room sofa can face the TV while the other side houses your gaming setup. Add a faux built-in fireplace to the wall for a cozy ambiance. Choose a color palette that ties the whole space together for a cohesive look.
9. Create a Dedicated Entryway
First impressions matter, even in a small apartment. Use a pressurized wall to create an entryway. This simple upgrade can dramatically change how your room feels upon entry. Add hooks for coats, a small bench for putting on shoes, and a mirror for last-minute checks. This addition is handy for your first apartment, helping to keep outdoor items organized and separate from your living space.
10. Construct a Stylish Room Divider
For a more open concept, use a pressurized wall as a partial room divider. This room divider idea allows you to separate spaces while maintaining an airy feel. Add a wooden frame to the wall for a more decorative touch. This approach gives you the best of both worlds – defined spaces with a cohesive look that doesn’t make your apartment feel closed off.
Conclusion
As we’ve seen, pressurized walls can transform tiny apartments. These ideas give small spaces more options. From private bedrooms to home offices and cozy reading nooks, pressurized walls offer flexibility, which modern city dwellers want. With these clever ideas, you can turn your small home into a stylish, multi-use space that will fit your needs and personality.
Build a Temporary Soundproof Wall in Your Apartment
The Need for Soundproofing in Apartments – Living in an apartment can pose challenges due to noise disruptions from neighboring units or external sources. Whether you work remotely, seek solace during peaceful evenings, or simply desire some quiet time, it becomes essential to consider soundproofing solutions that help maintain your well-being. One effective way to achieve a blissfully tranquil environment without permanent alterations is by constructing a temporary soundproof wall within your apartment. This solution ensures the creation of a serene atmosphere for uninterrupted tranquility.
Importance of Soundproofing
Soundproofing is essential for minimizing the transmission of unwanted noise. It creates a peaceful and quiet living space, enabling individuals to fully enjoy their surroundings. Additionally, soundproofing plays a crucial role in establishing an ideal work-from-home environment. By reducing distractions and improving focus, it facilitates productivity and concentration. Soundproofing can enhance the quality of sleep, contributing to improved overall well-being.
Factors to Consider Before Building a Temporary Soundproof Wall:
Temporary Solutions for Soundproofing Your Apartment:
Building a Temporary Soundproof Wall Panel
When it comes to achieving a temporary soundproof wall solution in one’s apartment, constructing a soundproof wall panel emerges as an effective and budget-friendly choice. By embracing some ingenuity along with the appropriate materials, individuals can relish a tranquil and noise-free living environment without violating their lease or carrying out permanent alterations to their space.
1. Measure and Plan:
Begin by measuring the area where you want to build the soundproof wall panel. This will help determine the dimensions and ensure a proper fit.
Consider the purpose of the wall panel. Are you trying to create a separate space for a home office or a second living room? Knowing the intended use will help guide your design decisions.
2. Gather the Materials:
Soundproofing material: Opt for acoustic foam panels, which are excellent at absorbing sound waves and minimizing sound transmission.
Regular curtains or soundproof curtains: These can be used to cover the front of the wall panel, providing an aesthetically pleasing finish.
3. Construct the Wall Panel:
4. Customize and Install:
Conclusion
In conclusion, creating a temporary soundproof wall in your apartment can be a game changer for achieving the much-needed peace and quiet in your space. By following the simple tips and techniques we’ve discussed, you can protect your sanity and enjoy blissful silence, even in a noisy environment. Start by analyzing the areas where sound leakage is most prominent, and then choose the right soundproofing materials that match your budget and preferences. Don’t forget to seal any gaps and cracks to maximize the effectiveness of your soundproof wall. contact us
Temporary Pressurized Walls Ideas for Your Home in NYC
Here are temporary pressurized walls ideas for your home in NYC.
The various styles and designs available for temporary pressurized walls
Sliding walls:
Accordion walls:
Freestanding walls:
Retractable walls:
Modular walls:
The benefits of using temporary pressurized walls
Tips for choosing the right temporary pressurized walls for your home in NYC
Determine your needs:
Consider the size of the space:
Research different options:
Look for high-quality materials:
Consider the cost:
Choose a reputable vendor:
Conclusion
Conclusion
How Do You Build a Temporary Pressurized Wall?
Types of materials used for temporary walls construction
Here are the materials used to construct temporary walls:
Drywall
Plywood
MDF
Plastic panels
Steps on how to build a temporary pressurized wall
Uses of a temporary wall
Creating privacy in your home
Changing the layout of your home
To create an office
Create Storage Space
Childproofing
Safety tips when building a temporary wall
Conclusion
How To Choose The Best Temporary Wall System
Durability
Aesthetics
● What colors do I like?
Time and Labor Considerations:
Safety Standards:
Compliance with Local Building Codes and Regulations:
Ease of installation
Flexibility
Manhattan Pressurized Walls Services
Pressurized wall systems offer many benefits including:
Now that you know how to choose the best temporary wall system for your needs, give us a call at our nearest branch and we’ll help you find the perfect solution for your next project!
By Donny Zanger · Published · Last updated: · 5 min read
How Much Does a Sliding Door Add to a Temporary Wall in NYC?
A pocket sliding door on a pressurized or flex wall adds a flat $300 to the base floor. The wall itself starts from $2,250 — 8 ft ceiling, up to 12 ft wide, standard swing door included. The sliding door is an upgrade on top of that floor, not a separate product. Here’s what it actually gets you, and when it’s worth it over the door that’s already included.
What a Pocket Sliding Door Actually Costs
A pocket sliding door adds $300 to the $2,250 base floor — flat, regardless of wall size. It’s the cheapest door upgrade we offer, less than a French door at $450. The trade-off is space, not privacy: a sliding door disappears into the wall cavity instead of swinging into the room, which matters in a tight hallway or a small bedroom where a swinging door would eat into the usable floor space.
The standard swing door that comes included in the $2,250 floor works fine for most rooms. The sliding upgrade is worth the extra $300 specifically when floor space near the door is tight — a narrow Manhattan bedroom, a hallway conversion, or a room where furniture placement leaves no clearance for a door to swing open.
Sliding Door vs. Swing Door: Which Fits Your Room?
Go with the included swing door if the room has normal clearance — most Brooklyn and Queens bedroom splits do. Go with the $300 pocket sliding upgrade if you’re converting a hallway, a narrow SoHo loft corridor, or any layout where a bed, desk, or dresser sits close enough to the doorway that a swinging door would hit it.
If natural light matters more than space savings, a French door at $450 is the other option — it swings like the standard door but uses glass panels instead of a solid panel. We cover the full add-on list, including ceiling height and soundproofing, in our complete pressurized wall cost guide.
Does the Door Type Change the Landlord Conversation?
No. Whether you pick the standard swing door, the sliding upgrade, or a French door, the wall is still the same pressurized system — no nails, no screws, fully removable. Pressurized walls are legal in NYC when they meet building code requirements for egress, ventilation, and sprinkler clearance, and the door style doesn’t change that. See our full pressurized walls legality guide for the details.
We still recommend getting written approval from your landlord before installation, regardless of which door you choose.
Frequently Asked Questions
How much does a sliding door add to a pressurized wall?
A pocket sliding door adds a flat $300 to the $2,250 base floor. It’s the cheapest door upgrade available — less than a French door at $450.
Why would I pick a sliding door over the included swing door?
Space. A sliding door disappears into the wall cavity instead of swinging into the room, which matters in a narrow hallway or a bedroom where furniture leaves no clearance for a swinging door.
Is the door type included in the base wall price?
The standard swing door is included in the $2,250 floor. A pocket sliding door adds $300, and a French door adds $450 — both are upgrades on top of the base floor, never a separate wall product.
Not sure which door fits your room? Call +1 646-569-9975 and we’ll help you decide before you book anything.
Donny Zanger has installed pressurized walls in NYC apartments for 15+ years, with over 5,000 installations across all five boroughs. pressurizedwallsnyc.com · +1 646-569-9975
Sliding doors are one of the most common types of doors in the world. They are found on everything from houses to RVs, and they serve a variety of purposes. They can be used for decoration, privacy, or even accessibility.
Sliding doors can be made out of many different materials including glass, wood, and plastic. They can also be used in many different ways, but they are most commonly used as a way to create an entrance into a room without taking up too much space. Some people even use sliding glass doors as their entire main entrance to their home or business.
Even though they are so popular and useful, they do have some common problems that may arise over time. These problems can range from minor inconveniences to major headaches that require professional repairs or replacements. Here are some common problems with sliding doors NYC and how to fix them:
Doesn’t slide easily
Sticks or catches when opening or closing
Noisy Sliding Door
If your sliding door is noisy, then it can be a real nuisance. This problem can usually be solved by lubricating the tracks on which the door slides and using good-quality rollers that have enough clearance between them and the track. If this doesn’t work, then you may need to replace the rollers or maybe even install new tracks altogether.
The Door Won’t Open All the Way
Sticking Doors
The Door Won’t Lock
The Door is Out of Alignment
If your door isn’t sliding easily, or if it’s pulling to one side or another, the first thing to check is whether or not the door is out of alignment. If this is the case, then all you need to do is adjust the rollers on either side of the track so that they are even with each other. You can do this by loosening up the screws on both sides of each roller with an Allen wrench and repositioning them until they’re even with each other. Then tighten up the screws again so that they don’t move while you’re trying to slide the door back into place.
The Hinges Are Loose
Why Use Temporary Walls for Sliding Doors NYC?
The reason why people use temporary walls New York Cityfor sliding doors is that it allows them to create a custom look for their home without having to spend too much money on it. If you want something unique and interesting in your home, then this might be something that you need to consider using in your home as well!
The Benefits of Pressurized Walls and How to Find the Best Temporary Wall Solution for Your Home
Are you looking to add more space and make the most of your home’s footprint? Try out a wall extension! As the name suggests, wall extensions are extra walls attached to the outside of your home to increase its size. You can add extra headroom, a second story, or even create a guest suite when installing a wall extension. The options are endless and dependent on your home, budget, and personal preferences.
Pressurized walls have several benefits that make them a popular temporary wall solution, especially if you’re looking for extra space or value for money. Here’s everything you need to know before looking into pressurized walls as a potential solution for your home and how to find the best temporary walls solution for your home.
Flexibility
A pressurized wall is going to be flexible in many ways. You’ll be able to expand your home’s space like a conventional fence would but with a lot less effort and cost. The wall panels used for a pressurized wall are usually made from a steel frame covered in fabric or vinyl cladding. This means you can expand the wall in one go, rather than installing a conventional framed wall first and then installing material or cladding.
This is particularly useful if you’re trying to expand your home onto an existing property. There’s a lot of talk around the “in-fill” wall extension, which is precisely what it sounds like – an extension built into the existing structure. In-fill wall extensions are becoming increasingly popular, which is excellent news for homeowners who want to maximize their footprint by adding a second story without affecting their neighbors.
Privacy and Security
Privacy and security are essential considerations when looking for a temporary solution to add more space or create a guest suite. Thankfully, pressurized walls feature sound-deadening materials to help minimize noise pollution and provide some much-needed silence.
Pressurized walls also incorporate Storm Valves to prevent unwanted intrusions by passers-by or wildlife. Storm Valves are sometimes called “ole-valves” and are essential in keeping insects and other wildlife out of your home. While they may look like a traditional valve, these storm valves are designed to withstand harsh weather conditions and prevent water from coming into your home.
There are also security benefits to installing a pressurized wall. The walls are usually constructed from a steel frame, enabling you to mount robust security equipment such as lights, cameras, and sensors. You can add extra lighting and run power back to the panel, or your home, via a dedicated adapter. This way, you can create a monitoring system that will let you check up on your home, even when you’re not there.
Money-saving
Another benefit of using a pressurized wall is money-saving. Although you’ll need to pay a bit more for the materials and delivery of a pressurized wall, the project’s overall cost will be significantly less than if you were to build a conventional extension. This is because you won’t need to purchase or hire a building contractor, and you won’t have the cost of demolition or the upkeep of a building site.
As a result, a pressurized wall is ideal for DIYers looking to save money or for homeowners who don’t have the time or patience to deal with the construction and finishing of a conventional extension.
Environmentally-friendly
Last but not least, installing a pressurized wall is likely to be a more environmentally-friendly solution than building a conventional extension. The use of steel, plywood, and other recycled materials, along with a low carbon footprint, means that you will be helping to save the planet while adding more space to your home.
Most pressurized walls are manufactured in a way that reduces the impact on the environment, and the panel itself is usually recyclable. This means that you won’t be left with a large, rusting metal structure that must be taken down when you’re finished.
In some cases, the panels used for a pressurized wall are made from wheat or sugarcane, both renewable and sustainable resources. This is excellent news for the environment and means that you will be doing your bit to save the planet.
Understanding the different types of pressurized wall
Before you pick out the correct type of wall for your home, you need to understand what’s available. There are three main pressurized walls: expanding, hollow and inflatable.
Expanding walls use steel frames and usually consist of two sheets of primed steel, held together with fiberglass or steel cables. The two sheets are connected with a series of expansion bolts or tension bands, which allow you to expand the wall in one go.
Hollow walls are similar to a conventional framed wall in construction, but they feature a void or “box” formed by the panels. The panels on a hollow wall are usually made from softer wood or composite materials.
Inflatable walls are a type of pop-up or roll-up wall consisting of a steel frame covered in a canvas or vinyl wall covering. The canvas wall covering an inflatable wall is usually removable, enabling you to take the wall down and store it when you’re not using it.
Benefits of using a pressurized wall
With so many benefits, it’s no wonder that pressurized walls are so popular. The following are some of the main advantages of using a pressurized wall:
● Installing a pressurized fence is a cost-effective way to add more space and height to your home.
● A flexible pressurized fence allows you to expand and contract your home as your family changes.
● A pressurized wall is usually easy and quick to install, and it can be done by yourself in a day or two.
● A pressurized wall is a more environmentally-friendly option than building a conventional extension.
● A pressurized wall is quieter than a traditional extension and can help promote feelings of privacy and security.
How to find the best temporary wall solution for your home
When looking for a temporary wall solution, you have a wide range of options. The following are some tips to help you find the best quick wall solution for your home:
● Do your research to find the best cost, flexibility, security, and energy efficiency options.
● Ask yourself this question: “What is my budget?” This will help you decide which type of temporary wall solution is best for you.
● Is your home close to public transport? This can help with the delivery and installation of a wall and reduce the inconvenience of moving it when you’re ready to take down the wall.
● What about the looks of a wall? Remember, you can always change the decor later, so don’t stress too much about the style.
● Is your home close to power points? You’ll need an extension box with a PowerPoint installed in some cases, which is an additional cost. Find out if you have this requirement before you purchase the wall panels.
Finding the best temporary wall solution for your home doesn’t have to be difficult, and in many cases, it doesn’t even have to be expensive. So take your time, do your research, and you’ll be able to find the best temporary wall solution for your home in no time.